Safety Razor Technique: The Correct Angle, Pressure and Pass Order
Affiliate Disclosure: As an Amazon Associate I earn from qualifying purchases. Some links in this article are affiliate links, meaning I may earn a small commission at no extra cost to you if you purchase through them. I only recommend products I have personally tested and trust.
I picked up my first double-edge safety razor over twenty years ago, and I still remember the first shave vividly — mostly because it was a disaster. Three weepers, a patch of razor burn on my neck, and a healthy dose of humiliation. I’d assumed that swapping a cartridge razor for a safety razor was a plug-and-play upgrade. It is not.
What separates a comfortable, close shave from a morning of regret is safety razor technique. Not the razor. Not the blade brand. Technique. The angle you hold the razor, the pressure you apply (or don’t apply), and the order in which you make your passes — these are the variables that determine whether wet shaving is a pleasure or a punishment.
After testing hundreds of razors and mentoring dozens of beginners on classic wet shaving forums, I’ve distilled everything that actually matters into this guide. Whether you’re brand new to the double-edge world or you’ve been shaving with a safety razor for months and still battling irritation, this is the article I wish I’d had on day one.
It’s worth noting that the market agrees wet shaving with quality tools is worth the investment: the global safety razor market sits at USD 6.1 Billion in 2026, projected to grow to USD 8.31 Billion by 2035 (source: globalgrowthinsights.com). More people are discovering what devotees have known for decades — when you get the technique right, nothing beats a well-executed safety razor shave.
The 30-Degree Angle: The Foundation of Every Good Shave
If I could tell a new wet shaver only one thing, it would be this: angle is everything. Get the angle right and most other problems become manageable. Get it wrong and no amount of expensive soap, premium blades, or gorgeous hardware will save you.
The target angle for most double-edge safety razors is approximately 30 degrees from the skin. That sounds precise, and it is — but there’s a practical way to find it without a protractor.
How to Find Your 30-Degree Angle
- Place the top cap of the razor flat against your cheek. The handle will be pointing almost straight out to the side — that’s roughly 90 degrees. The blade is not touching skin yet.
- Slowly tilt the handle downward toward your face. You’re rotating the razor toward the skin.
- Stop when you feel the blade just begin to make contact with the stubble. You’ll often hear a faint, clean scraping sound — that’s the blade engaging.
- That contact point is your 30-degree angle. Lock in that position and begin your stroke.
The most common mistake beginners make is setting the angle too steep — essentially holding the razor like a shovel, handle nearly parallel to the face. A steep angle (closer to 45 or 60 degrees) causes the blade edge to scrape laterally across the skin rather than slicing through stubble cleanly. The result: irritation, redness, and a shave that feels rough no matter how good your prep is.
The opposite problem — a too-shallow angle — means you’re mostly buffing the lather off with the top cap rather than cutting hair. The shave takes forever and you’re left with significant stubble.
How Razor Design Affects Optimal Angle
Here’s where it gets nuanced: the ideal angle varies slightly by razor. Blade gap (the exposure of the blade edge beyond the safety bar) and blade reveal (how much blade sticks out from the head) both shift the sweet spot.
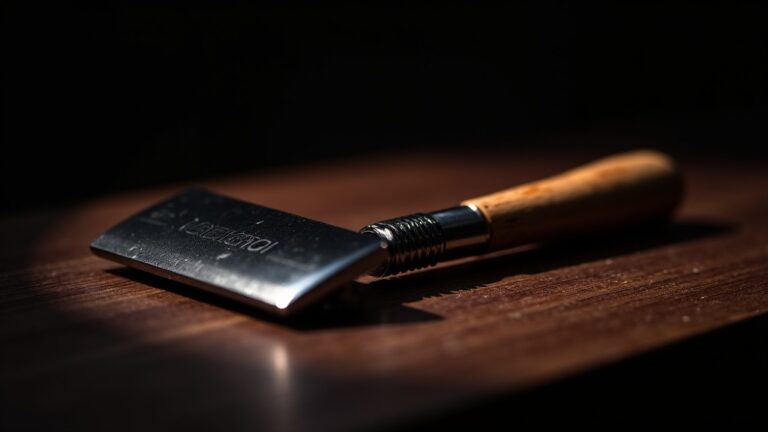
- Mild razors (like the Merkur 34C) have a tighter blade gap. They’re forgiving of angle variations and good for beginners.
- Aggressive razors (like the Merkur 38C or vintage Gillette adjustables) expose more blade. They reward precise angle work and punish sloppy technique hard.
- Open-comb razors tend to have a steeper effective blade angle baked into the design — you often shave at a slightly more upright position.
My advice: start with a mild, closed-comb razor while you develop your angle instinct. The forgiveness of a mild razor buys you the time to build muscle memory without sacrificing your face in the process.
Zero Pressure: The Hardest Habit to Build
If angle is the foundation, pressure — or rather, the absence of it — is the roof. Nothing I teach new shavers is harder to internalize than this: you should apply zero deliberate pressure to a safety razor.
We are conditioned by years of cartridge shaving to press the razor into our skin. Cartridge razors have spring-loaded heads designed to absorb pressure. Multiple blades lift and cut in a single stroke. The system is engineered around the assumption that users will push. Safety razors are the opposite.
Let the Weight Do the Work
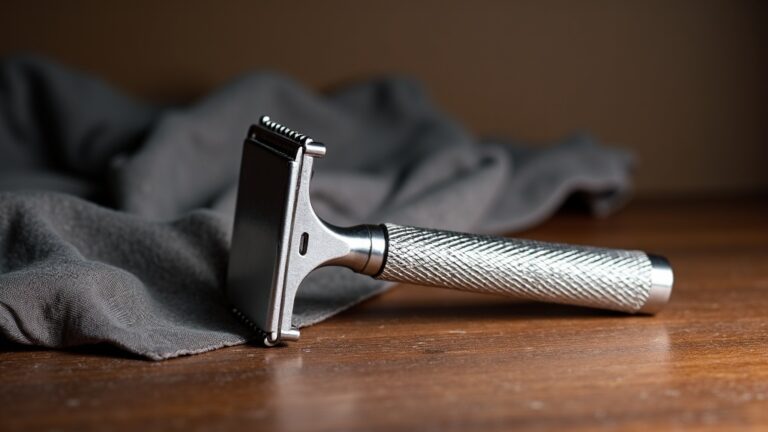
A well-made double-edge safety razor weighs between 70 and 120 grams. That weight is intentional. It is sufficient cutting force, all on its own, when the razor is held at the correct angle and allowed to glide across properly lathered skin.
Here’s the test I give to every beginner: rest the razor on your cheek and let gravity pull it downward. Don’t grip. Don’t guide. Just let it fall an inch or two. You’ll likely hear the faint sound of stubble being cut. That’s how little force is needed. Your job as the shaver is purely directional — you steer, you don’t push.
A peer-reviewed study on skin and shaving (PubMed, PMID 38279588) underscores just how sensitive facial skin is to mechanical stress. Excess pressure doesn’t just cause surface irritation — it disrupts the skin barrier, increases transepidermal water loss, and can trigger inflammatory responses that linger for hours. This is the science behind why that “one extra pass under the chin” with too much pressure turns into a day of discomfort.
Signs You’re Using Too Much Pressure
- Small cuts or “weepers” (pinprick blood spots) after a single pass
- Red, inflamed skin within minutes of finishing
- A burning sensation when you apply aftershave
- Shaving feeling like work — a sense of dragging or resistance
If you’re experiencing any of these, consciously loosen your grip on the handle. Many shavers find that holding the razor at the very bottom of the handle (as far from the head as possible) naturally prevents over-gripping. Try it on your next shave — it’s a simple mechanical change that forces you to rely on weight instead of muscle.
Pass Order: WTG, XTG, and ATG Explained
The classic wet shaving community has developed a pass system over decades of collective experimentation. It’s not arbitrary — each pass serves a distinct purpose and prepares the skin for the next. Understanding the logic helps you adapt the system to your own face and hair growth patterns.
Pass 1: With The Grain (WTG)
Your first pass always goes with the direction your hair grows. This is the “roughing pass.” Its purpose is to reduce the bulk of your stubble efficiently, with the lowest possible insult to skin. At the end of a proper WTG pass, you should have reduced a few days’ growth to something resembling a heavy shadow — not baby smooth, but dramatically shorter.
Key points for the WTG pass:
- Use short, overlapping strokes — 1 to 2 inches at a time. Long sweeping strokes invite angle variation.
- Rinse the razor frequently — every 2–3 strokes on dense stubble. A clogged razor drags.
- Re-lather between passes. Never shave with dried or thin lather. A quality shaving brush makes re-lathering quick and effective.
Pass 2: Across The Grain (XTG)
After your WTG pass and re-lather, the second pass goes perpendicular to your hair growth direction. On most faces, this means shaving horizontally on the cheeks if your hair grows downward, or at an angle on the neck where growth patterns shift.
The XTG pass is where the real closeness is built. Because you’re cutting across the grain rather than with it, the blade catches more of the stubble that the first pass laid down but didn’t fully cut. The combination of WTG + XTG gets most men to a “great shave” result — close, comfortable, and presentable for any situation.
Many experienced wet shavers stop here. Two passes, done well, is a complete shave. Three passes is a choice, not a requirement.
Pass 3: Against The Grain (ATG) — Optional
The third pass goes opposite to your hair growth direction. It is the most aggressive pass mechanically and produces the closest possible result — sometimes called “baby butt smooth” in shaving communities. It is also the pass most likely to cause irritation if your technique is off or your skin isn’t ready.
My guidelines for the ATG pass:
- Don’t attempt it in your first 2–3 weeks of safety razor shaving. Build your technique on WTG and XTG first.
- Always re-lather fully before an ATG pass. The lather is not cosmetic — it’s a critical lubricating and cushioning layer.
- If you have sensitive skin or coarse, curly hair, ATG on the neck can reliably cause ingrown hairs. Skip it on problematic areas.
- Use even lighter pressure on ATG than you do on WTG. If WTG is zero pressure, ATG is negative pressure — you’re almost floating the razor.
Lather Prep and the Stretch Technique
Technique doesn’t begin when razor meets skin. It begins in the prep phase. I’ve watched skilled shavers rescue a mediocre razor with excellent lather prep, and I’ve watched expensive hardware produce terrible results because the user skipped proper preparation. Prep is not optional.
Building the Right Lather
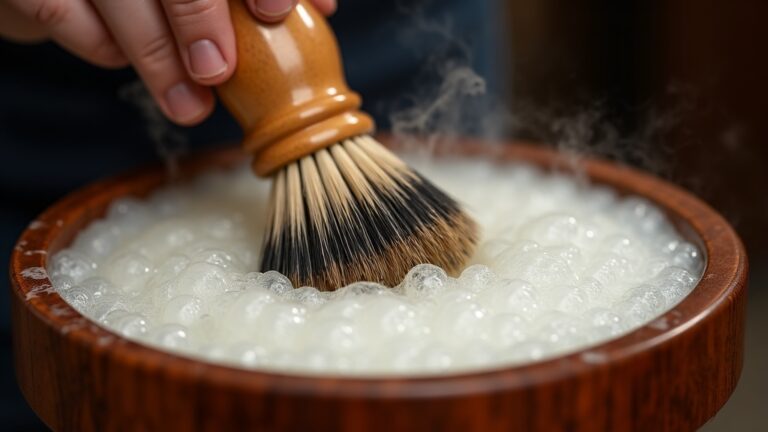
I use a quality badger hair shaving brush every single shave. A good brush does three things simultaneously: it exfoliates the skin, lifts stubble away from the face, and builds a dense, slick lather that cushions the blade. No brush? Your fingertips will never match this.
The lather consistency matters. You want something between yogurt and whipped cream — dense, glossy, and able to hold its structure on the face. Lather that’s too wet (runny) provides inadequate cushion. Lather that’s too dry (crumbly, matte) drags the razor and dries out mid-pass.
A premium shaving soap like Proraso is an excellent starting point. The glycerin content keeps the lather slick even as you work through a three-pass shave. A Columbia University wet shaving resource (blogs.cuit.columbia.edu) recommends loading the brush for a full 30 seconds on a hard soap puck — most beginners under-load and wonder why their lather collapses mid-shave.
The Stretch Technique
Your free hand — the one not holding the razor — has a critical job during every pass. Its job is to stretch the skin taut ahead of the blade.
Here’s why this matters: the blade cuts most efficiently when the skin surface is flat and firm. Loose, pliable skin bunches in front of the blade edge, which causes the razor to chatter, jump, or dig rather than glide. Cuts and irritation follow.
The technique: as you bring the razor down toward a stroke, use the fingers of your free hand to gently pull the skin in the opposite direction of the stroke — creating tension. On the cheek, pull upward slightly as you shave downward. On the neck, this becomes more complex because the skin is looser and the contours are tighter. Tilt your head back and to the side to naturally tension the neck skin, then use fingers to fine-tune as needed.
This single habit — consistently stretching the skin — eliminates a large percentage of beginner weepers and drastically reduces the micro-irritation that accumulates across multiple passes.
Grain Mapping: Know Your Face Before You Shave It
One of the most overlooked steps in safety razor technique — and one that separates intermediate shavers from experienced ones — is grain mapping: understanding the exact direction your facial hair grows in every zone of your face and neck.
Most men assume their hair grows straight down everywhere. It doesn’t. It is extremely common to have hair that grows downward on the cheeks, sideways on the upper lip, diagonally across the jaw, and in a completely different direction on different zones of the neck. Shaving “against the grain” in the wrong direction in a given zone, or shaving “with the grain” in a direction that’s actually across the grain — this is the hidden source of persistent irritation for many shavers who think they’re doing everything right.
How to Map Your Grain
- Wait 2–3 days without shaving. You need visible stubble length to determine direction accurately.
- With a clean, dry face, run your fingertips across each zone of your face and neck. Hair growth direction is the direction that feels smooth. Moving against the grain feels rough and bristly.
- Divide your face into zones: cheeks (left and right separately), upper lip, chin, jaw (left and right), upper neck, lower neck.
- Map each zone. Many men find their neck has at least 3 or 4 different growth directions — some areas grow down, others grow sideways, and a small patch under the jawline often grows upward.
- Consider drawing a quick diagram or taking a reference photo the first time.
Once you know your grain map, you can execute each pass with precision. Your WTG pass isn’t just “downward” — it’s “downward on cheeks, sideways toward the ear on the jaw, slightly upward on the lower neck,” and so on. This level of attention pays compound dividends over every shave you take for the rest of your life.
Grain Mapping and Razor Aggressiveness
If you’re using an aggressive razor with a wide blade gap (such as vintage Gillette Open Combs or modern razors like the Merkur 38C Barber Pole), grain mapping becomes even more critical. The wider the blade gap, the more blade is exposed, and the more dramatically a misread grain direction will punish you. Aggressive razors respect those who know their grain and punish those who don’t.
Troubleshooting: Common Mistakes and How to Fix Them
After twenty years of shaving and helping others get started, I’ve seen the same problems appear over and over. Here’s a diagnostic guide to the most common technique failures, and the specific fixes for each.
Problem: Razor Burn and Redness After Every Shave
Most likely cause: Too much pressure, wrong angle, or both.
Fix: Go back to basics. For one full week, do only a single WTG pass with zero pressure. No XTG, no ATG. Just one pass, correct angle, correct pressure. If your shave improves, you were overworking your skin. Reintroduce the XTG pass in week two, and the ATG pass (if desired) in week three or four. Building back up this way recalibrates your muscle memory.
Problem: Weepers on the Neck Every Single Time
Most likely cause: Ignoring grain direction on the neck, or skipping the stretch technique in a complex contour area.
Fix: Re-map your neck grain specifically. The neck is the most variable area on most men’s faces. Additionally, always tilt your head back when shaving the neck — this naturally flattens and tightens the skin. Use your free hand to pull skin taut before each stroke. Take shorter strokes (1 inch maximum) around the jawline and under the chin.
Problem: Not Getting a Close Shave Despite Multiple Passes
Most likely cause: Blade too dull, lather too thin, or angle too shallow.
Fix: First, replace the blade. Even quality blades start to degrade after 3–5 shaves for most men with coarser stubble. A sampler pack of double-edge blades lets you test 8–10 different brands to find your optimal blade. Second, check your lather — load your brush longer and build lather more thoroughly. Third, steepen your angle very slightly and see if the blade engages more effectively.
Problem: Ingrown Hairs on the Neck
Most likely cause: Shaving ATG in an area prone to curly or tightly coiled regrowth, combined with too much pressure.
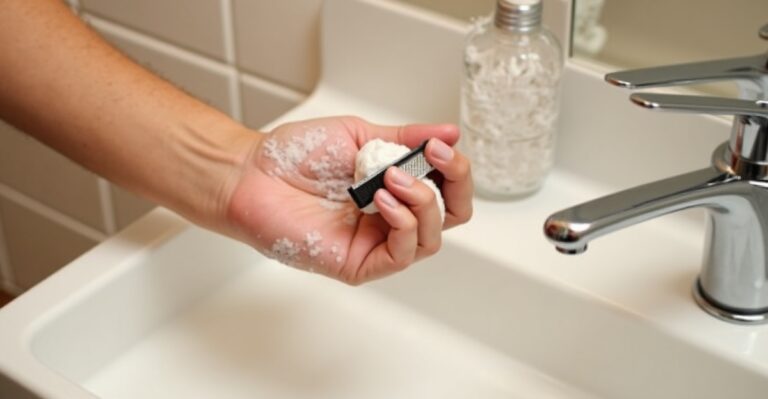
Fix: Stop the ATG pass on the neck entirely. For men with coarser, curlier hair, ATG on the neck is often simply not worth the tradeoff. A WTG + XTG combination produces excellent results without the ingrown hair risk. Additionally, consider adding a mild exfoliating wash to your morning routine on non-shave days — clearing dead skin cells reduces the chance of hairs curling back into the follicle.
Problem: Chattering or Inconsistent Blade Feel
Most likely cause: Blade is not seated properly in the razor head, or the razor head is not tightened fully.
Fix: Disassemble your razor and re-seat the blade. Always tighten the razor head just past finger-tight — you should feel a definite stop, not just friction. A loose blade will rock slightly in the head and produce an inconsistent, chattery stroke. This is a common oversight even among experienced shavers switching to a new razor.
Adjusting Technique for Razor Aggressiveness
Not all safety razors shave alike, and technique must adapt to the tool:
- Mild razors (narrow blade gap, low exposure): More forgiving. You can afford slight angle variation. Good for daily shavers and sensitive skin.
- Aggressive razors (wide blade gap, high exposure): Demand precise angle and zero-pressure discipline. Reward experienced technique with exceptional closeness. Not suitable for beginners.
- Adjustable razors (like the vintage Gillette Slim or Fatboy): Start at the lowest setting (1–2) and increase aggressiveness gradually as your technique improves. These are ideal learning tools.
- Single-edge razors and injectors: Shave at a flatter angle than DE razors — typically 20–25 degrees. The technique principles (zero pressure, grain mapping, stretch) apply equally.
Building Your Technique Over Time
Everything I’ve described in this guide points toward a single truth: safety razor technique is a learned physical skill, not a set of instructions you read once and master immediately. The brain knows the theory after the first read. The hands take weeks to catch up.
Here’s a realistic timeline based on my experience teaching beginners:
- Week 1: Focus exclusively on angle and pressure. One WTG pass only. Expect the shave to be imperfect — that’s fine. You’re learning, not performing.
- Week 2: Add the XTG pass. Map your grain and begin working with it intentionally. Practice the stretch technique.
- Weeks 3–4: Refine lather consistency. Experiment with different blade brands using a sampler pack. Most shavers find their “daily driver” blade somewhere in this window.
- Month 2: If desired, introduce the ATG pass on low-risk areas (cheeks) first before attempting the neck.
- Month 3+: By now, technique is largely automated. This is when the real enjoyment begins — you can start exploring different razors, soaps, and blades purely for the pleasure of the craft.
The investment is real but the payoff is substantial. A quality safety razor like the Merkur 34C Heavy Duty costs roughly the same as a two-month supply of cartridge refills — and lasts a lifetime. Double-edge blades cost pennies each. Once your technique is solid, wet shaving is not just better for your skin, it’s dramatically cheaper than the cartridge treadmill.
I’m still refining my own technique, two decades in. There’s always something to learn from a new razor, a new soap, or a conversation with another wet shaver. That’s part of what makes this hobby endlessly engaging. But the foundation — angle, pressure, pass order — never changes. Get those three things right, and everything else is refinement.
Start there. Your face will thank you.
Thomas Hargrove has been wet shaving with double-edge safety razors for over 20 years and has reviewed hundreds of razors, blades, and shaving soaps for Classic Blade. He specializes in helping beginners develop technique and recommending the right tools for every skin type and budget.

About Thomas Hargrove
Traditional Wet Shaver — 23 Years, 300+ Razors Tested
Thomas Hargrove picked up his grandfather’s safety razor at 19 and never looked back. Twenty-three years and 300+ razors later, he’s one of the most experienced wet shavers writing on the internet today. At Classic Blade, he reviews gear with the same precision he brings to every shave — unhurried, exacting, and always worth reading. Read more →