How to Load a Safety Razor Blade Without Cutting Yourself
Disclosure: This post contains affiliate links. If you purchase through our links, we may earn a small commission at no extra cost to you.
In my 30 years as a professional barber, handling over 50,000 shaves, the question I hear most from beginners is never about technique or lather. It’s always: “How do I load a safety razor blade without cutting myself?” The irony is that most shaving cuts happen before the razor ever touches your face — they happen during setup.
This guide will walk you through the exact method I’ve used for three decades: the grip, the wrapper technique, and the disposal process that keeps your fingers intact every single time.
Why Loading a Safety Razor Blade Is Riskier Than People Think
A double-edge (DE) safety razor blade has four edges: two long cutting edges running lengthwise, and two short ends. The cutting edges are factory-sharpened to a level that makes most kitchen knives look dull. A fresh Feather blade, for example, can draw blood from a feather-light touch — they’re that sharp.
The confusion comes from the name. “Safety razor” refers to the safety of the shave itself, not the blade loading process. That thin strip of steel in your fingers is serious business. But with the right technique, you’ll never have a problem.
Step-by-Step: How to Load a Safety Razor Blade Without Cutting Yourself
Step 1: Disassemble Your Razor Completely
Before touching the blade, fully disassemble your razor. For a three-piece razor (the most common type), unscrew the handle counterclockwise, lift off the top cap, and set the base plate on a flat, dry surface. For a butterfly (twist-to-open) razor, twist the handle until the top petals spread fully open. Never attempt to load with the razor partially assembled — this is how fingers get pinched between moving parts.
Step 2: Open the Blade Wrapper from the Short End
Most DE blades come in paper envelopes or waxed cardboard sleeves. Hold the wrapper with your thumb and forefinger at the short end (the narrow side, not the long side). Slide the blade out lengthwise. Never tear the wrapper open along the long edge — this exposes the cutting edge while your fingers are still near it.
Premium blades like Feather Hi-Stainless DE Blades often include a cardboard interleaver between each blade. Use that cardboard as your handling tool — grip only the cardboard, never the metal.
Step 3: Grip Only the Short Ends of the Blade
Once out of the wrapper, hold the blade by pinching only the two short ends between your thumb and forefinger. These short ends are not sharpened. The long sides of the blade — the ones that extend the full length — contain the cutting edges. Keep all fingers away from the long sides at all times.
Think of it like picking up a piece of broken glass by the corner. Same instinct, same execution.
Step 4: Position on the Base Plate
While holding the blade by its short ends, lower it onto the base plate. Most razors have a center post or alignment bar that guides the blade into position. Let gravity do the work — the blade should drop into place. Check that it’s centered: equal overhang on each long side, blade sitting flat against the plate. Do not drag the blade into position.
Step 5: Reassemble and Tighten
Once the blade is seated, you can rest one finger gently on the flat center of the blade to keep it stable while you place the top cap. Thread the handle on until snug — about finger-tight plus a quarter turn. Over-tightening a three-piece razor strips threads; under-tightening causes blade rattle and an inconsistent shave.
The Wrapper-Assist Technique (Extra Safety for Beginners)
Here’s the method I teach nervous first-timers at the shop. Instead of removing the blade fully before loading:
- Slide the blade halfway out of its wrapper, so it extends about half its length
- Crease the wrapper to create a stiff “handle”
- Position the exposed half on the base plate’s center post
- Slowly slide the wrapper out from under as you lower the top cap
This technique means your fingers never directly contact the blade at all. It’s a few seconds slower but eliminates the risk entirely for people who haven’t developed the short-end grip instinct yet.
Which Blades Are Best for Beginners?
Blade selection matters for safety. Ultra-sharp blades like Feathers are brilliant once you have 20+ shaves of experience, but they punish improper technique aggressively. For your first month:
- Astra Superior Platinum — the go-to beginner blade; sharp enough for a clean shave, forgiving enough for technique mistakes
- Derby Extra — the mildest major brand; ideal for very sensitive skin or first-time wet shavers
- Gillette Nacet — a step up from Astra, still forgiving, with an incredibly smooth coating
I always recommend buying a sampler pack before committing to 100 blades of one brand. Blade preference is intensely personal — what feels perfect to me may pull on your face.
Blade Disposal: The Step Everyone Ignores
A used blade is still dangerous. Never drop a bare used blade in the trash — it will slice through the bag and injure sanitation workers. Use a blade bank (a small sealed tin with a disposal slot), or use the built-in disposal slot on the back panel of most blade boxes.
When a blade bank is full, tape it shut and mark it “SHARPS” before disposing. In my 30 years I’ve used a vintage tin that’s held well over 2,000 blades — never a single garbage bag injury.
Common Blade Loading Mistakes
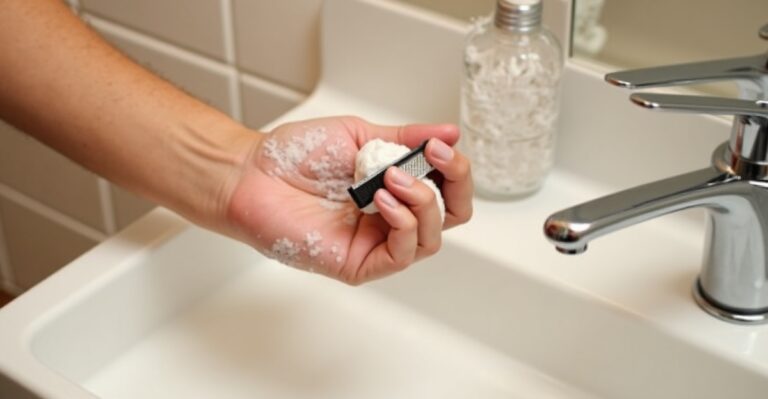
- Wet hands: Always dry your hands before handling blades. Soap makes fingers slippery and cuts more likely.
- Loading over the sink: A dropped blade over a drain is both a safety hazard and a loss. Use a dry counter or tray.
- Touching the cutting edge “to check alignment”: Check visually only. The blade should show equal overhang on both long sides.
- Rushing in the morning: The vast majority of loading cuts happen when people are late and moving fast. Slow down. A blade load takes 15 seconds done right.
FAQ: Loading Safety Razor Blades
Does it matter which side of the blade faces up?
No. Double-edge blades are perfectly symmetrical — both sides are identical cutting edges. Either side can face the cap. What matters is centering.
How tight should I tighten the razor head?
Firm hand-tight plus about a quarter turn. If you feel significant resistance, stop. Over-torquing cracks vintage bakelite handles and strips aluminum threads on modern razors.
How many shaves per blade before I change it?
Most shavers get 4–7 shaves. I use a blade for 5 passes maximum. The moment you feel any dragging, tugging, or increased irritation, change it — blades are 10 cents each, a comfortable shave is priceless.
Can I use the same blade in different razors?
Yes, DE blades are standardized. A Feather blade loads into a Merkur, Edwin Jagger, Rockwell, or any other DE razor without issue.
The Bottom Line
Loading a safety razor blade without cutting yourself requires three habits: dry hands, short-end grip, and no rushing. Once these become automatic — usually after a week of shaving — you’ll load blades faster than most people uncap a cartridge razor.
The safety razor’s reputation for danger is almost entirely about improper blade handling, not the shave itself. Master the load, and you’ve mastered the hardest part of wet shaving.
Next read: Shaving Angle and Pass Guide — Get the Geometry Right for a complete tutorial on pressure, angle, and grain mapping.