How to Use a Safety Razor: The Complete Beginner’s Guide
I still remember the first time I picked up a safety razor. I’d been spending nearly $30 a month on cartridge refills, getting mediocre shaves, and dealing with constant razor burn along my jawline. A coworker with impossibly smooth skin told me his secret: he’d switched to a double-edge safety razor fifteen years ago and never looked back. That conversation changed my mornings forever.
Fifteen years later, I can tell you with absolute certainty that learning how to use a safety razor is one of the best grooming decisions you’ll ever make. The learning curve is real — about two weeks — but the payoff is dramatic: closer shaves, zero ingrown hairs, and a shaving cost that drops to pennies per blade. This guide covers everything a beginner needs to know, from picking up your first kit to nailing your technique in the first week.
What You Need to Get Started
You don’t need much, but you do need the right things. Trying to safety razor shave with cheap foam and no brush is setting yourself up for a rough introduction. Here’s what actually matters:
The Razor
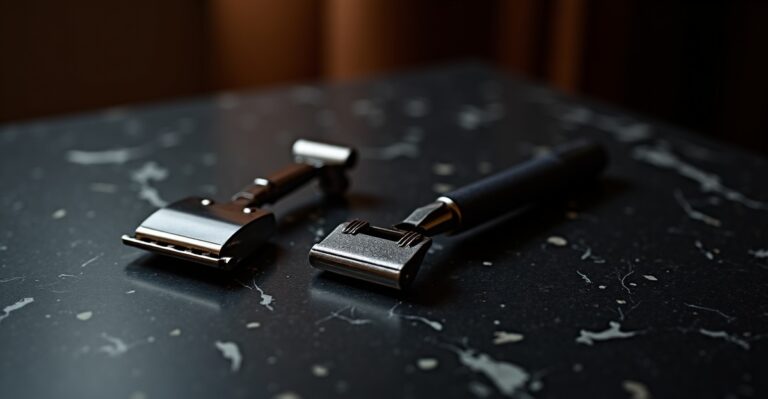
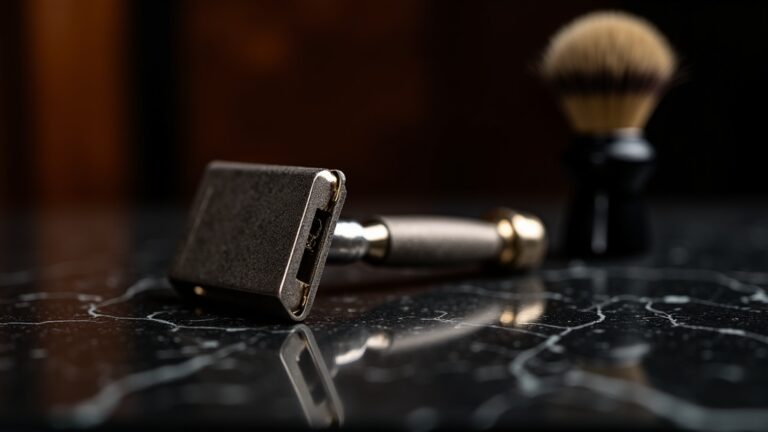
For beginners, there’s one recommendation I make above all others: the Merkur 34C Heavy Duty Short Handle. It’s a mild, forgiving razor with excellent build quality and weight that does some of the work for you. The short handle gives you more control, and the closed comb design is ideal for new shavers. I’ve handed this razor to a dozen friends over the years; every single one thanked me for it.
The Blades
Blades are where the experimentation begins, but for starting out, Astra Superior Platinum blades are the gold standard recommendation. They’re sharp enough to cut cleanly, smooth enough not to bite, and cost about ten cents each. Buy a 100-pack — at that price, you’ll change blades frequently, which is one of the keys to great shaves.
The Brush
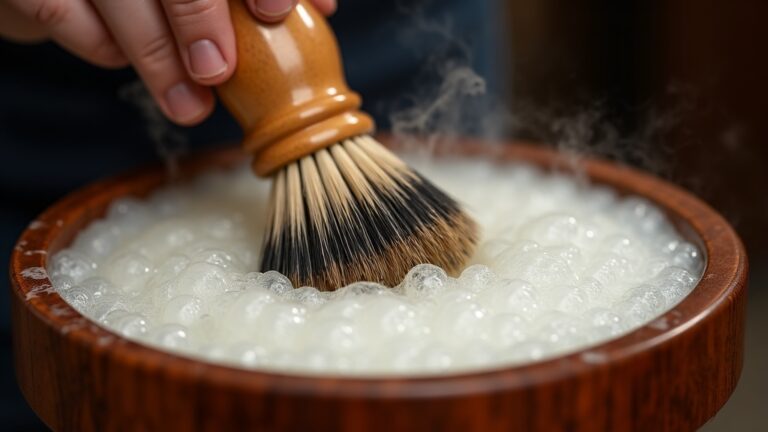
A shaving brush isn’t optional — it’s fundamental. The brush builds a rich lather, lifts the hairs away from the skin, and exfoliates the face before the blade ever touches it. A quality badger or synthetic shaving brush in the $20–$40 range is plenty for a beginner. Synthetic brushes have caught up with badger in recent years and are easier to maintain.
The Shaving Cream or Soap
Skip the canned foam entirely. It’s designed for cartridge razors and doesn’t provide the lubrication or cushion a safety razor needs. A tube of quality shaving cream will last months and produce a slick, dense lather that genuinely protects your skin. More on soap versus cream below, but either is vastly superior to aerosol foam.
Prep Your Face
Preparation is at least 40% of the shave. I cannot overstate this. Most beginners skip prep and blame the razor when they get irritation. The truth is that a well-prepped face shaves dramatically better than a dry one.
Hot Water and Steam
The ideal scenario is shaving immediately after a hot shower. The steam and heat soften the hair shaft significantly — some estimates suggest well-hydrated hairs require up to 70% less force to cut. If you don’t shower beforehand, spend 60–90 seconds with a hot, wet towel pressed against your face before you start.
Pre-Shave Oil (Optional but Helpful)
Pre-shave oil creates an additional layer of glide between blade and skin. It’s not essential, but if you have sensitive skin or coarse hair, a few drops rubbed into a damp face before applying lather can make a meaningful difference. Apply it to wet skin and leave it on — you apply lather on top of it.
Rinse and Stay Wet
Your face should be wet when you apply lather. Don’t pat it dry. Wet skin is supple skin, and supple skin shaves far more comfortably.
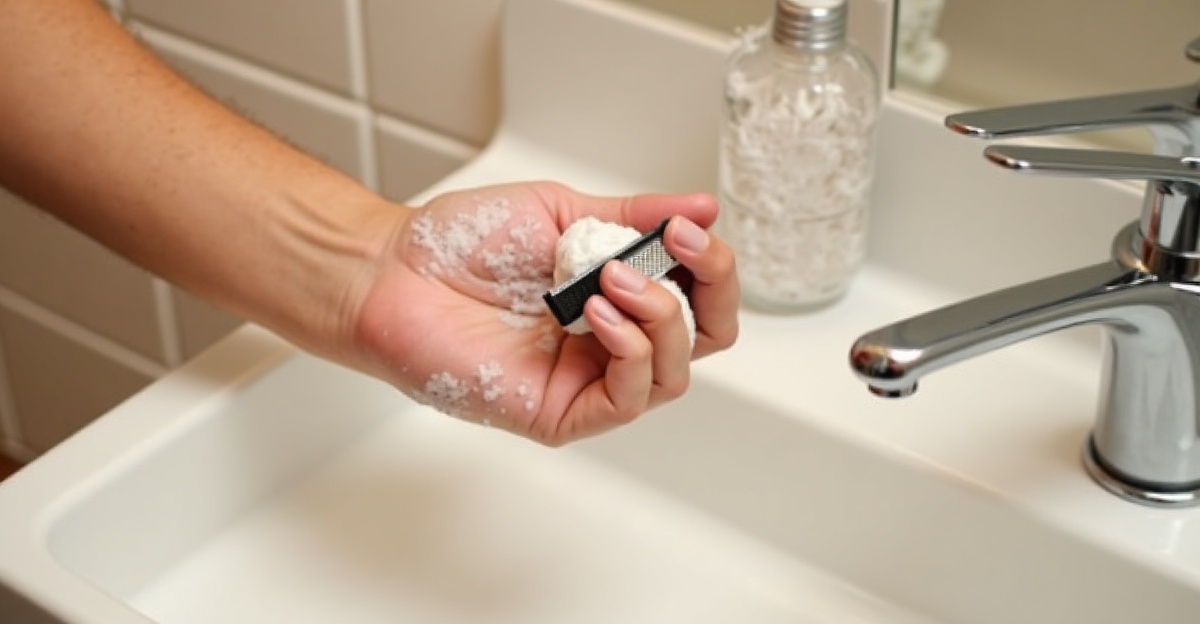
Loading the Blade
Loading a blade into a safety razor is simple, but it deserves its own section because one small mistake — a misaligned blade — causes a lot of beginner problems.
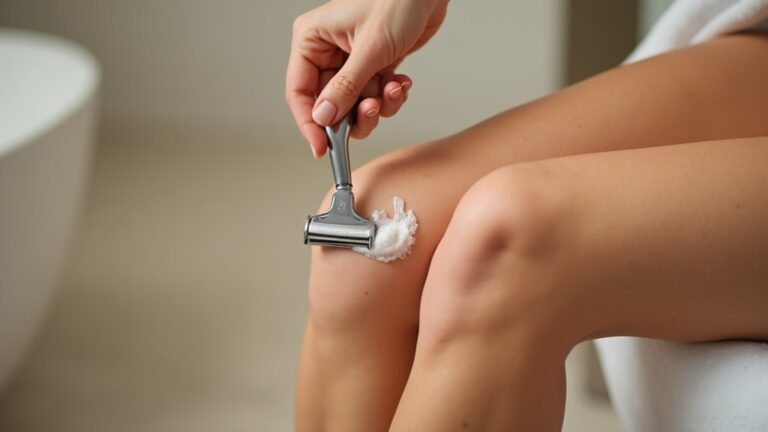
Unscrew the handle of your Merkur 34C counterclockwise. The head separates into two pieces (a three-piece design). Pick up a blade by its short ends — never the long cutting edges — and place it flat on the bottom piece of the head. The blade should sit level, centered over the post. Replace the top piece, then the handle, and tighten until snug. Don’t overtighten; firm finger pressure is enough.
Give the razor a visual check: the blade should overhang evenly on both sides. An uneven blade is a common cause of one-sided irritation. If it looks off, unscrew, reseat the blade, and reassemble.
Change blades after 3–5 shaves. A dull blade doesn’t glide — it drags and pulls. Blades are so cheap there’s no reason to push them. When a shave stops feeling smooth, the blade is done.
The Shave Technique
This is where safety razor shaving genuinely differs from cartridge shaving, and where most beginners go wrong. There are two non-negotiable rules: angle and pressure.
The Angle
Hold the razor at roughly 30 degrees to your skin. Not 45, not flat — about 30. A practical way to find this: place the top of the razor head flat against your cheek, then slowly lower the handle until the blade just begins to contact the skin. That’s your starting angle. Keep it consistent throughout the stroke.
If the angle is too steep (handle too close to face), the blade bites and causes cuts. Too shallow and you’re not cutting at all — the razor glides without shaving. The 30-degree zone is where magic happens.
Zero Pressure
This is the single most important lesson in safety razor shaving: use no pressure. Let the weight of the razor do the work. The Merkur 34C weighs about 80 grams for exactly this reason — that weight is intentional.
Cartridge razors are designed to be pressed into the face. Safety razors are not. Pressing a DE razor into your skin is the primary cause of cuts and irritation for beginners. Hold it gently, like a pen you’re afraid of dropping. Let gravity and the razor’s own weight do all the cutting.
Short Strokes, With the Grain
On your first pass, always shave with the grain (WTG) — the direction your hair grows. Use short strokes, 1–2 inches at a time, especially around curves like the chin and jawline. Keep the skin taut by gently pulling it in the opposite direction of your stroke.
Passes
Traditional wet shaving uses multiple passes for a close result:
- Pass 1 (WTG): With the grain. Removes the bulk of the hair. This is your only pass as a beginner for the first week.
- Pass 2 (XTG): Across the grain. Adds closeness once you’re comfortable with pass 1.
- Pass 3 (ATG): Against the grain. Baby-smooth finish. Add this only after 2–3 weeks of consistent technique.
Relather between every pass. Never do a second pass on dry skin.
Finishing Up
The post-shave ritual matters as much as the shave itself. Your skin has just had a blade run across it multiple times — it needs care.
Cold Water Rinse
Rinse your face thoroughly with cold water. The cold closes pores, reduces any minor inflammation, and signals to your skin that the shave is done. Take your time here — 30 seconds of cold rinse, getting into the neck and under the jaw.
Alum Block
An alum block is a compressed block of potassium alum that acts as a mild antiseptic and astringent. Wet it and rub it over your freshly shaved face. It will sting lightly on any spots where you applied too much pressure or nicked yourself — that feedback is valuable data. It stings less as your technique improves. Rinse off after 30 seconds.
Aftershave
Finish with an aftershave — either a balm (moisturizing, good for dry or sensitive skin) or a splash (alcohol-based, more antiseptic, classic scent experience). Let it dry, and you’re done. The whole process takes about 10–15 minutes once you’re comfortable.
Common Beginner Mistakes
I’ve coached enough friends through their first safety razor shaves to know exactly where things go sideways. Here are the most common pitfalls:
- Too much pressure. Already mentioned, but worth repeating — it’s the number-one mistake. If you’re getting cuts and irritation, pressure is the first thing to check.
- Wrong angle. Too steep and you’ll nick yourself. Practice the 30-degree angle on your arm first to get the feel before touching your face.
- Using canned foam. It lacks the lubrication and cushion a safety razor needs. Use a real lather.
- Not prepping the face. Hot water and proper lather aren’t optional rituals — they’re functional requirements.
- Rushing. Safety razor shaving rewards slowness. Slow down, shorten your strokes, and pay attention.
- Skipping blade changes. A dull blade is a punishing blade. Change it after 3–5 shaves without hesitation.
- Going ATG too soon. Against-the-grain shaving multiplies irritation risk. Master WTG for a full week before adding passes.
- Mapping grain incorrectly. Grain doesn’t always grow downward. Run a finger across your neck — the resistance direction tells you which way it grows. Map your face before shaving, especially the neck.
Your First Week — What to Expect
Let me be honest with you: your first few shaves will probably not be your best shaves. That’s normal and expected. Here’s a realistic timeline:
Days 1–2: Tentative, slightly awkward. You’re overthinking the angle and probably using slightly too much pressure. The shave is decent but maybe not better than your cartridge results yet. Minor nicks are possible. That’s fine — this is learning.
Days 3–5: The angle starts feeling natural. You’re building confidence, extending your strokes. The shave quality begins to surpass your cartridge results noticeably. Any neck irritation should be decreasing.
Days 6–7: Comfortable enough with WTG to try adding an XTG second pass. The improvement in closeness is immediate and gratifying. You’re starting to understand why people do this.
Week 2 and beyond: You’re dialing in your personal technique. You learn which areas need more attention, what angle works best for your beard growth pattern, how your skin responds. By week three, most beginners are achieving shaves far superior to anything a cartridge razor ever gave them.
Stick with it through the learning curve. I’ve never met someone who mastered the technique and went back to cartridges.
Conclusion
Learning how to use a safety razor is less complicated than it might appear from the outside, but it does require unlearning the habits you developed with cartridges. The fundamentals — light touch, correct angle, proper prep, quality lather — aren’t hard to learn. They just require deliberate attention for the first couple of weeks.
What you get on the other side is worth it: consistently close, comfortable shaves, skin that improves over time rather than suffering under constant cartridge drag, and a ritual that actually feels good rather than something to rush through.
Start with the Merkur 34C, load it with Astra blades, get a decent brush, and pick up a quality shaving cream. Prep your face, respect the angle, kill the pressure, and be patient. Your skin will thank you.
— James, fifteen years into the best shaving decision I ever made